
So, you’re thinking about sprucing up your garden pathways with some lights? It’s a great idea. Modern LED pathway lights are a super practical way to make your outdoor spaces safer and more inviting after the sun goes down. They’re not just about aesthetics; good lighting can help you navigate your garden, highlight key features, and even deter unwanted visitors. Let’s dive into what makes these lights tick and how you can use them to transform your own little slice of nature.
When it comes to illuminating your garden paths, LEDs are the clear winners these days. Forget those old, power-hungry halogen bulbs that you were constantly replacing. LEDs have seriously changed the game. They’re efficient, long-lasting, and offer a lot more flexibility in terms of design and colour.
Energy Efficiency: Saving Money and the Planet
This is probably the biggest perk of going LED. LED lights Inzuzu use a fraction of the electricity compared to traditional incandescent or halogen bulbs. What does that mean for you? Lower electricity bills, which is always a good thing. Plus, by using less energy, you’re also doing your bit for the environment. It’s a win-win. The upfront cost of LED fixtures might be a bit higher, but the savings over their lifespan more than make up for it.
Longevity: Set It and Forget It (Mostly)
LEDs are built to last. We’re talking tens of thousands of hours of light. This means you won’t be spending your evenings digging up pathways to replace burnt-out bulbs. For pathway lights, where replacement can be a bit of a hassle, this longevity is a massive advantage. You can install them and then just enjoy your illuminated garden for years to come.
Design Flexibility
LED technology allows for incredibly compact and versatile designs. This means pathway lights can be sleek and subtle, or they can be more decorative and feature-rich. You’ll find everything from minimalist bollards to lights that project interesting patterns. This variety lets you match the lights to your garden’s style, whether it’s modern and minimalist or rustic and traditional.
Durability and Weather Resistance
Most modern LED pathway lights are designed with outdoor use in mind. They are typically made from rust-resistant materials like aluminum or stainless steel and are sealed to protect against moisture, dust, and even extreme temperatures. This means they can withstand the elements without compromising performance.
Types of LED Pathway Lights to Consider
When you start looking at options, you’ll notice there are quite a few different styles of LED pathway lights. Each has its own advantages and works best in different situations. It’s not just about one size fits all.
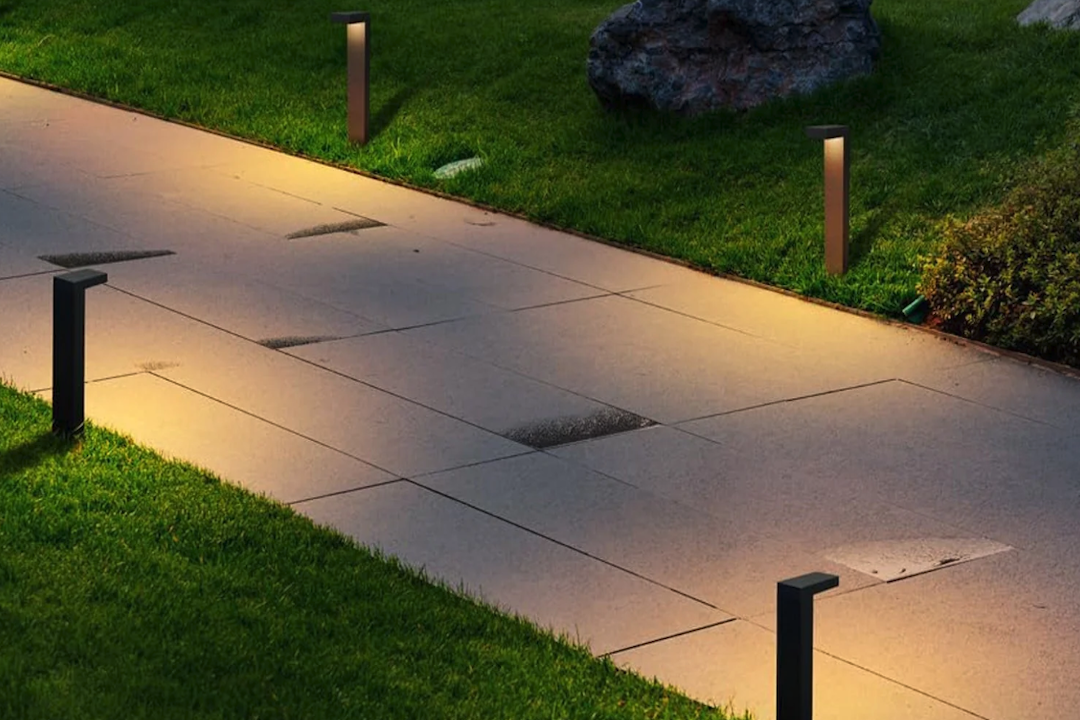
Bollard Lights: The Classic Choice
Bollard lights are probably what most people picture when they think of pathway lighting. They’re essentially short posts that stand a few feet off the ground, emitting light downwards and outwards. They provide a good spread of illumination and are excellent for defining the edges of a path and making it easy to see where you’re going.
Low-Profile Bollards
These are great for more subtle lighting. They don’t take up much visual space and are ideal for narrower paths or gardens where you want the plants to be the main focus.
Decorative Bollards
If you want your pathway lights to be a feature in themselves, decorative bollards come in all sorts of shapes, sizes, and finishes. They can add a touch of artistry to your garden even when they’re not illuminated.
In-Ground and Recessed Lights: The Subtle Approach
For a really clean, modern look, in-ground or recessed lights are fantastic. These are installed flush with the ground or pavement, meaning all you see is the light itself. They’re incredibly discreet and don’t create any visual clutter.
Ground-Level Spotlights
These can be used to highlight specific plants, sculptures, or architectural features along your pathway. They create dramatic accents and add depth to your garden’s nighttime appearance.
Path-Edging Lights
Smaller versions of these can be embedded along the very edge of the pathway, providing a soft, guiding glow without being overpowering. They’re perfect for creating a sense of enclosure and guiding visitors gently along.
String Lights: Adding Ambiance and Whimsy
While not strictly “pathway lights,” LED string lights are a popular and effective way to add warmth and a festive feel to garden paths, especially during entertaining. They can be draped over trees, pergolas, or fences that run alongside your paths, creating a magical atmosphere.
Fairy Lights
Delicate and numerous, fairy lights can be woven through shrubbery or along low walls near pathways, casting a soft, twinkling glow.
Globe or Edison Bulb String Lights
These offer a more substantial light source and a vintage aesthetic. They are great for illuminating seating areas adjacent to pathways or for creating a focal point.
Step Lights: Essential for Safety and Style
If your pathways involve steps, dedicated step lights are a must. They are small, often designed to be mounted on the riser of each step, providing direct light exactly where it’s needed for safety. They’re unobtrusive and can be incredibly stylish.
Integrated Step Lights
These are designed to blend seamlessly into the structure of the steps themselves, often with a very low profile.
Surface-Mounted Step Lights
These are easier to install on existing steps and can offer a slightly more pronounced light source for clear visibility.
Planning Your LED Pathway Lighting Layout
Just buying a bunch of lights isn’t really the best approach. A little bit of planning goes a long way to ensuring your pathway lighting is functional, attractive, and safe. Think about how you actually use your paths and what you want your garden to look like after dark.
Mapping Your Pathways and Highlighting Features
First things first, walk your pathways in the evening. See where it gets genuinely dark. Identify any tricky spots, uneven surfaces, or potential tripping hazards. Also, note any features you’d like to accentuate – a beautiful tree, a garden sculpture, a particularly striking shrub. These can become focal points for your lighting.
Determining Light Spacing and Intensity
The spacing of your lights depends on the type of light you’re using and the width of your pathway. For general guidance, lights every 10-15 feet are often sufficient for wider paths. For markers or guiding lights, you might place them closer. The intensity (or brightness) is also important. You want enough light to see, but not so much that it’s glaring or washes out the natural beauty of your garden. Most LED pathway lights come with different lumen outputs, so choose what suits your needs.
Considering Voltage: Low Voltage vs. Line Voltage
When setting up your system, you’ll come across two main voltage options: low voltage (typically 12V) and line voltage (120V).
Low Voltage Systems: The DIY Friendly Option
Low voltage systems are generally safer for DIY installation because they use a transformer to step down the voltage. They are also more flexible in terms of placement and are often the preferred choice for garden lighting. You’ll need a transformer, which plugs into a standard outdoor outlet and then connects to your lights via buried cable.
Line Voltage Systems: For Power and Simplicity
Line voltage systems run directly from your main electrical supply. While they are more powerful and might require fewer fixtures for the same coverage, installation often requires an electrician due to safety regulations. They are usually reserved for more extensive or commercial-style installations.
Powering Your Lights: Transformers and Timers
For low voltage systems, a transformer is essential. It converts your home’s standard voltage into the lower voltage required by your lights. You’ll need to size the transformer based on the total wattage of all your lights and the distance of the cable run.
Smart Timers and Dimmers
To make your lighting truly functional and energy-efficient, consider incorporating timers. These can turn your lights on at dusk and off at dawn, or at specific set times. Smart timers can often be controlled via an app, giving you even more flexibility. Dimmers are also a great addition, allowing you to adjust the brightness for different occasions or times of night.
Choosing the Right LED Color Temperature
The color of the light your LEDs emit can dramatically change the mood and appearance of your garden. LED technology offers a spectrum of color temperatures, usually measured in Kelvin (K).
Warm White: Natural and Inviting (2700K – 3000K)
This is the most common and generally most pleasing color temperature for outdoor lighting. It mimics the warm glow of traditional incandescent bulbs and creates a cozy, inviting atmosphere. It enhances the natural colors of plants and flowers without making them look artificial. For garden pathways, warm white is usually the best bet for creating a comfortable and welcoming ambiance.
Neutral White: Clear and Crisp (3500K – 4000K)
Neutral white offers a brighter, cleaner light. It’s still fairly natural but can make colors appear a bit more vivid. It’s a good option if you need slightly more visibility on your paths or if you want a more contemporary feel. It’s not usually the first choice for pathways where ambiance is key, but it can work in modern garden designs.
Cool White/Daylight: Modern and Bright (5000K+)
Cool white light is very bright and can make colors appear a bit blue-toned. While it provides excellent visibility, it can sometimes feel stark or artificial in a garden setting, especially at night. It’s generally better suited for task lighting or very modern, minimalist landscapes where a clinical or futuristic look is desired. For pathways, it can make them feel less inviting.
Installation and Maintenance Tips
Getting your lights installed correctly is key to their longevity and performance. And a little bit of upkeep will keep them looking and working great.
DIY Installation Considerations
If you’re going with a low-voltage system, a DIY installation is definitely achievable for most people.
- Safety First: Always turn off the power at the breaker before working with any electrical components.
- Cable Burial: Bury your low-voltage cable at least 6 inches deep to protect it from shovels and lawnmowers. Using conduit adds an extra layer of protection.
- Transformer Placement: Position your transformer close to an outdoor GFCI-protected electrical outlet, ideally in a sheltered location.
- Waterproofing Connections: Ensure all electrical connections are well-insulated and waterproof, especially those made underground. Use waterproof wire connectors specifically designed for outdoor, low-voltage lighting.
Professional Installation
If you’re not comfortable with electrical work, or if you’re opting for a line voltage system, it’s always best to hire a qualified electrician. They’ll ensure everything is installed to code and safely. They can also advise on the best system for your specific needs and garden layout.
Regular Maintenance Checks
Even the most robust lights need a little TLC.
- Cleaning Lenses: Over time, dirt and grime can build up on the lenses of your lights, dimming their output. Periodically clean them with a soft cloth and mild soap.
- Checking for Damage: Inspect your fixtures for any signs of damage from weather, animals, or lawn equipment.
- Tightening Connections: Occasionally check that all electrical connections are secure.
- Trimming Overgrowth: Keep any nearby plants trimmed back so they don’t obstruct the light or cause premature damage to the fixtures.
By taking these steps, you’ll ensure your LED garden pathway lights not only look good but also perform reliably for years to come, making your garden a pleasure to navigate all through the night.