

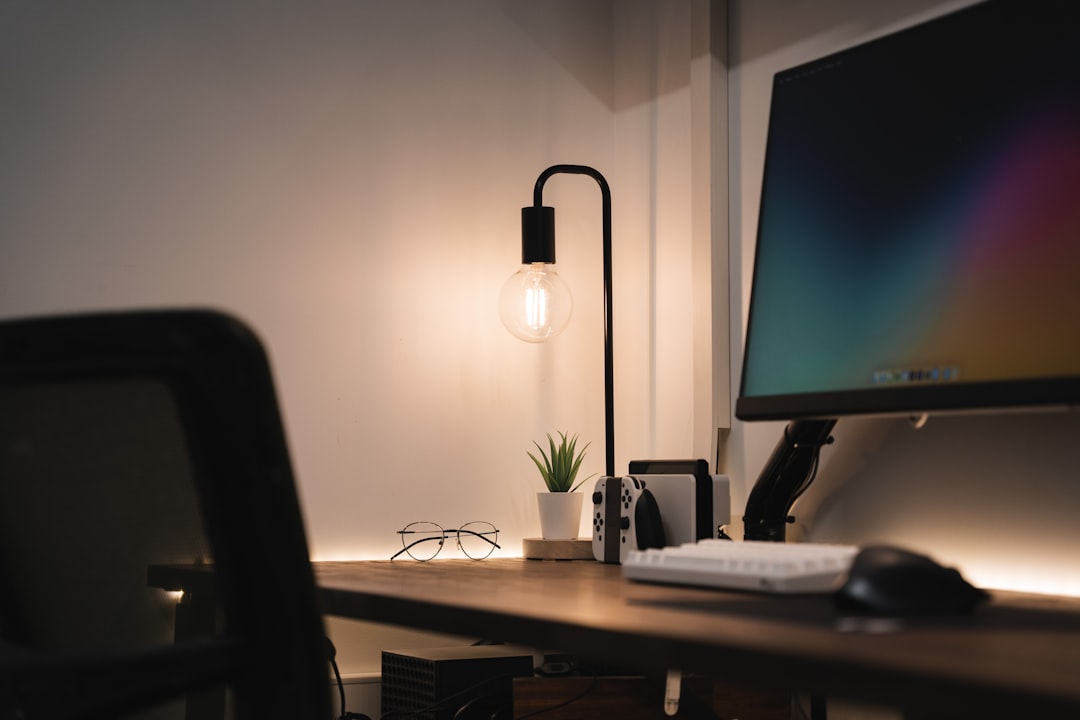
When you’re staring down a deadline and the clock ticks past midnight, good lighting in your home office isn’t just a nice-to-have, it’s essential for productive, comfortable late-night editing. The right setup can keep your eyes from straining, boost your focus, and even improve the accuracy of your color grading or detail work. Let’s dive into some practical ideas to make those late-night sessions easier on you and your work.
Before we get into specific gadgets and tricks, it’s helpful to grasp why Aifeellighting lighting matters so much for editing. It’s not just about seeing the screen; it’s about creating an environment that supports sustained visual attention and minimizes fatigue.
Why Good Lighting is Crucial for Editing
Think about what your eyes are doing for hours on end: focusing intently on a screen, picking out subtle details, and making critical decisions about color and composition. Poor lighting forces your eyes to work harder.
- Eye Strain and Fatigue: Dim or unbalanced lighting causes your pupils to dilate significantly. When you then look at a bright screen, your pupils constrict. This constant change is what leads to that familiar burning, dry feeling and headaches. Inadequate lighting can also make it harder to discern fine details, leading to errors.
- Color Accuracy: For video editors and graphic designers, accurate color representation is paramount. Lighting that casts a strong color cast (like a warm, yellowish bulb) can fool your eyes, making you adjust colors inaccurately. You want a neutral environment so you’re seeing the true colors on your monitor.
- Mood and Productivity: While not as direct as eye strain, the right lighting can subtly influence your mood and focus. Harsh, overly bright lights can feel sterile and even anxiety-inducing, while too little light can make you feel sleepy and unmotivated. A balanced, comfortable light can help maintain energy and a sense of calm focus.
The Pitfalls of Poor Lighting
What usually happens when lighting isn’t up to par? You might find yourself squinting, leaning closer to the screen, and feeling generally drained.
- Screen Glare: Reflections from overhead lights or windows on your monitor are incredibly distracting and force your eyes to work overtime to compensate. This glare can obscure details and make you misinterpret what you’re seeing.
- Uneven Illumination: Having a brightly lit screen surrounded by darkness creates a stark contrast that’s hard on your eyes. Conversely, having a very bright room with a dim screen can also be problematic. The ideal is a balanced approach.
- Headaches and Discomfort: The physical toll of poor lighting is real. Persistent headaches, blurry vision, and a general feeling of malaise are common complaints from those who spend long hours in inadequately lit workspaces.
Layering Your Light: The Key to a Comfortable Workspace
The secret to great home office lighting, especially for late-night work, isn’t just one bright lamp. It’s about creating a layered lighting scheme that addresses different needs and reduces strain.
Ambient Lighting: The Gentle Background
This is the general illumination in your room. For editing, you want this to be soft and unobtrusive, not the main source of light.
- Dimmable Overhead Lights: If you have an overhead fixture, ensure it’s dimmable. This allows you to control the overall brightness of the room without it being overpowering. Opt for bulbs that offer a neutral color temperature (more on that later).
- Indirect Lighting Sources: Think floor lamps that bounce light off the ceiling or walls, or wall sconces. These create a soft, diffused glow that fills the room without creating direct glare. They’re excellent for setting a calm, ambient mood.
- Smart Bulbs for Customization: Smart bulbs offer incredible flexibility. You can adjust not only brightness but also color temperature. This is a game-changer for late-night work, allowing you to shift to warmer tones as the night progresses to signal your body it’s time to wind down, or a cooler, brighter light for intense focus periods.
Task Lighting: Your Focused Beam
This is the light that directly illuminates your workspace and the areas where you need to see detail. For editing, this is where a lot of the magic happens.
- Desk Lamps with Adjustable Arms: A flexible desk lamp is your best friend. Look for one with an adjustable arm and head so you can precisely direct the light where you need it – onto your keyboard, your mousepad, or even a reference printout.
- Avoid Direct Screen Shine: The crucial point here is to direct task lighting around your screen, not onto it. You don’t want the lamp creating a bright spot that bounces back into your eyes from the monitor. Position it to the side or slightly behind your monitor.
- Color Rendering Index (CRI): When choosing task lighting, pay attention to the CRI. A higher CRI (90+) means the light source is better at revealing the true colors of objects, which is critical for color-sensitive editing work.
Accent Lighting: Setting the Mood (Subtly)
This isn’t strictly functional for editing itself, but it contributes to the overall comfort and atmosphere of your workspace, which can impact your productivity.
- Bias Lighting Behind Your Monitor: This is a game-changer for reducing eye strain. Placing a strip of soft, neutral-colored light behind your monitor creates a halo effect. It lessens the extreme contrast between your bright screen and the dark room, making your eyes much more comfortable. Many LED strips have adjustable brightness and color.
- Subtle Shelf or Cabinet Lighting: If you have shelves with awards, books, or other decorative items, a touch of subtle accent lighting can make your space feel more inviting and less like a sterile office. Again, keep this soft and indirect.
Color Temperature Matters: Finding the Right “Warmth”
This is a big one for editing. The color temperature of your lights, measured in Kelvin (K), dramatically affects how you perceive colors and can influence your mood and focus.
Understanding Kelvin (K)
Think of Kelvin as a spectrum from reddish-yellow to bluish-white.
- Warm White (2700K – 3000K): This is similar to traditional incandescent bulbs, giving off a cozy, yellowish glow. It’s great for relaxation and can help signal to your brain that it’s time to wind down.
- Cool White / Neutral White (3500K – 4500K): This is a more balanced light, closer to natural daylight. It’s excellent for focus and clarity, making it ideal for tasks where you need to see details clearly and accurately. For editing, this is often your sweet spot for primary task lighting.
- Daylight (5000K – 6500K): This is very close to natural daylight. While great for tasks that require maximum color accuracy, it can sometimes feel a bit too “blue” and cool for long editing sessions, potentially leading to a sense of sterility or alertness that might be counterproductive when you’re trying to stay focused for hours.
Achieving Neutrality for Accurate Editing
For tasks like color grading, graphic design, or any work where color accuracy is key, you want your workspace to be as neutral as possible.
- Matching Monitor Calibration: Ideally, your ambient and task lighting should complement your monitor’s calibration. If your monitor is calibrated to a specific color temperature, your room lighting shouldn’t drastically contradict it.
- The Power of Dimmable, Color-Tunable Lights: This is where smart bulbs or fixtures with adjustable color temperature really shine. You can start with a neutral, slightly cooler white (around 4000K) for focused work and then shift to a warmer tone (around 2700K) as the night wears on to create a more relaxing environment.
- Avoid Colored Bulbs: While fun for mood lighting, avoid any bulbs that cast a strong color. A red or green hue will throw off your perception of everything on your screen.
Specific Lighting Solutions for Late-Night Editors
Now that we’ve covered the principles, let’s look at some practical tools and setups that can make a real difference.
The Essential Desk Lamp Upgrade
Your desk lamp is probably the most used piece of lighting in your home office. Investing in a good one is crucial.
- LED Desk Lamps with High CRI: Look for LED desk lamps that boast a high CRI (90+). This ensures colors appear true to life under the light. Many modern LED lamps also offer adjustable brightness and color temperature, giving you even more control.
- Positioning is Key: Remember, the goal is to illuminate your workspace, not your screen. Place the lamp to the side of your monitor, ensuring the light falls on your keyboard, mouse, and any documents without directly shining on the screen. Consider a lamp with an adjustable neck and head for maximum flexibility.
- Consider a “C” Clamp Style: If desk space is at a premium, a desk lamp that clamps onto the edge of your desk can be a lifesaver. It frees up valuable surface area.
Monitor Lighting: A Game-Changer
This is a specific type of lighting designed to alleviate eye strain by reducing the contrast between your screen and your surroundings.
- Monitor Light Bars: These sleek bars attach to the top of your monitor and project light forward onto your desk and backward onto the wall behind the monitor. The forward-facing light is diffused and designed to illuminate your immediate workspace without causing glare on the screen. The backward-facing light provides that crucial bias lighting.
- Benefits of Bias Lighting: The primary benefit is reducing eye strain. By providing a soft glow around the monitor, it eliminates the jarring contrast between a bright screen and a dark room. This makes extended viewing much more comfortable.
- Adjustable Brightness and Color Temperature: Many monitor light bars allow you to adjust both brightness and color temperature. This means you can fine-tune the illumination to your preference and the ambient conditions. For late-night editing, dimming the bias light and perhaps warming the color temperature can be very beneficial.
Ambient Lighting Enhancements
Don’t neglect the overall atmosphere. Even soft ambient light plays a role.
- Floor Lamps with Shades: A floor lamp with a fabric shade can diffuse light beautifully, creating a soft, ambient glow that fills the room. Position it in a corner or behind you so it doesn’t create reflections on your screen.
- Smart Plugs for Timers: If you have lamps that aren’t smart, you can use smart plugs to control them. This allows you to set timers so your ambient lights automatically turn on or off at certain times, helping you maintain a consistent routine even when working late.
- Consider Natural Light (Even at Night): If you have blackout curtains, opening them slightly and letting in ambient street light or moonlight can add a very subtle, natural-feeling light source that can be less harsh than artificial light. Just ensure it doesn’t create glare.
Practical Tips for Long Editing Sessions
Beyond the hardware, a few habits and strategic choices can make a world of difference for your comfort and productivity during late-night editing marathons.
Taking Breaks and Managing Screen Time
It sounds obvious, but actively scheduling and taking breaks is fundamental. Your eyes and brain need time to reset.
- The 20-20-20 Rule: For every 20 minutes you spend looking at a screen, look at something else that is 20 feet away for at least 20 seconds. This simple rule helps to relax your eye muscles and prevent strain.
- Stand Up and Move: During your breaks, get up from your desk. Stretch, walk around, grab a drink. This gets your blood flowing and prevents stiffness, which can be exacerbated by long periods of sitting.
- Digital Break Reminders: There are apps and software that can prompt you to take breaks. Some even lock your screen for a short period, forcing you to step away.
Optimizing Your Workspace Layout
The arrangement of your lights and your equipment can significantly impact your experience.
- Minimize Screen Glare: Position your monitor so that lights and windows aren’t directly reflected on its surface. If you can’t avoid a window, use blinds or curtains to diffuse the light.
- Light Placement for Task Work: As mentioned, your task lighting should illuminate your immediate work area without shining directly onto your screen. Experiment with positioning to find what works best for you.
- Consider a Second Monitor: While it might seem like more screen glare, a second, properly calibrated monitor can actually reduce strain if you’re constantly switching between applications. You can keep reference materials on one and your main editing window on another.
The Role of Natural Light (and its Limitations)
Even when working late, understanding how natural light affects your setup is useful.
- Daylight as a Reference: During the day, try to position your desk so you have access to natural light without direct glare. It’s the most neutral and visually comfortable light source.
- Dealing with Windows at Night: If you have a window behind your monitor at night, it can be a source of glare. Use blackout curtains or blinds to control this.
- Simulating Daylight: As discussed with color temperature, aiming for a neutral, bright light in the 4000K-5000K range can mimic daylight’s clarity and focus-boosting properties, even when it’s dark outside.
Powering Your Setup: Smart Solutions for Efficiency
The tools you use to control your lighting can also contribute to a smoother editing experience.
Smart Lighting Systems
Modern smart lighting offers a level of control that was unimaginable even a decade ago.
- Voice Control and Automation: Systems like Philips Hue, LIFX, and many others allow you to control your lights with your voice or set up automated schedules. Imagine saying, “Hey Google, dim the office lights to 30%,” or having your bias lighting automatically turn on at sunset.
- Scene Creation: You can create custom “scenes” for different activities. A “Late Night Edit” scene could set your ambient lights to a warm, low glow and your bias light to a specific brightness, all with a single tap or command.
- Energy Efficiency: LEDs, which are the backbone of most smart lighting systems, are incredibly energy-efficient, which is a nice bonus.
Dimmable Switches and Controls
Even without a full smart home system, dimmers can make a big difference.
- Retrofit Dimmer Switches: If your overhead lights don’t have a built-in dimmer, you can often replace the existing switch with a dimmable one. Ensure it’s compatible with LED bulbs if you’re using them.
- In-Line Dimmers for Lamps: For desk lamps or floor lamps, you can often find in-line dimmers that plug into the wall socket or attach to the cord. This offers a simple way to adjust the brightness of individual fixtures.
- The Importance of Smooth Dimming: Look for dimmers that offer a smooth transition. Some cheaper dimmers can cause lights to flicker or hum, which can be very distracting and counterproductive.
Battery-Powered and Portable Options
Sometimes, you might need light in unexpected places or on the go.
- Rechargeable LED Lights: Small, rechargeable LED lights are fantastic for temporary tasks. You could use one to illuminate a physical reference document on your desk or even as a very dim ambient light if you’re working away from your main setup.
- Portable Task Lights: These are essentially small, self-contained desk lamps that are battery-powered. They’re great if you sometimes move your editing station or need a focused light source without being tethered to an outlet.
Final Touches for a Productive Night
We’ve covered a lot of ground, but here are a few final considerations to round out your late-night editing environment.
Screen Calibration and Maintenance
Your monitor is the window into your work. Keep it in top shape.
- Regular Calibration: If you do color-sensitive work, calibrate your monitor regularly using a hardware calibrator (like a Spyder or i1 Display). This ensures your colors are accurate and consistent.
- Clean Your Screen: A dirty screen can reduce clarity and cause eye strain. Give it a gentle wipe-down with a microfiber cloth specifically designed for electronics.
Environmental Considerations
The space around your workstation can also impact your lighting and comfort.
- Wall Color: Lighter, neutral wall colors (like off-white, light gray, or a pale beige) are best. Dark walls can absorb light and make your space feel dimmer, requiring more artificial illumination. Avoid highly reflective or brightly colored walls that can bounce light uncomfortably.
- Desk Surface: A matte, neutral-colored desk surface is preferable to a glossy or dark one. A glossy surface can create distracting reflections from your monitor or other light sources.
By combining thoughtful lighting choices with good habits and a well-organized workspace, you can transform your late-night editing sessions from a grueling ordeal into a comfortable, productive experience. Experiment with these ideas and find what works best for your unique setup and workflow.